Grease trap cleaning: 7 quick and easy steps
In total, around 75,000 blockages are cleared from our sewers each year.
Most of these are caused by cooking fats and oils, which harden to form a thick layer of gunk inside pipes. (Ref: www.thameswater.co.uk) This can cause serious damage to the pipes and the environment. A grease trap's job is to intercept these greases and solids before they enter the wastewater disposal system. They are used in a variety of environments, including:
- Restaurant
- Takeaways
- Cafes
- Hotels
- Pubs, bars and inns
- Schools and colleges
- Bakeries
The substances released from these environments pass through a catching system, giving them time to cool and solidify. The water passes through the drain as normal. The grease trap system must be cleaned and maintained regularly to work effectively. When properly maintained, they could save your business huge amounts of money.
Where are grease traps found?
The first step to cleaning your grease trap is successfully locating it. Generally, grease traps are located outside of a building. The trap looks like a manhole cover. However, they can also be found underneath the sink or in a box that sits on top of the kitchen floor.
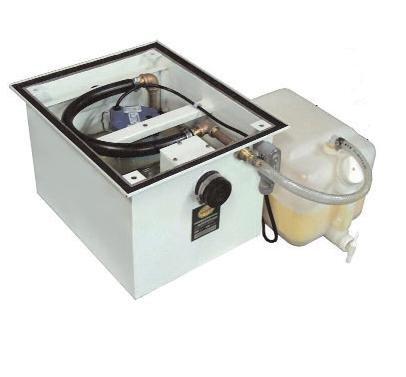
How do grease traps work?
They work by stopping fats, oils and grease from entering into the wastewater system. When wastewater enters, it starts to flow so slowly that it’s given time to cool, separating into three distinct layers. The grease rises to the top while the solids settle at the bottom. The greywater is separated and escapes into the wastewater system. Many have strainers for collecting solid debris. This helps to reduce the collection of solids settling at the bottom.
How often should grease traps be cleaned?
The regularity of cleaning depends entirely on the amount of wastewater your property produces and the size of the grease trap. However, we generally recommend that cleaning is carried out every 2-4 weeks. That period can lengthen this period up to 8 weeks if you add biological grease treatment fluid into the system to help improve performance. You must inspect traps regularly to assess cleaning needs.
Read on to find out the grease trap cleaning procedure.
Remove the grease trap cover.
The first step to cleaning your grease trap is to remove the trap cover. Ensure you take this process slowly, as there is are gaskets located just under the lid, and you don’t want to damage these in the cleaning process. Otherwise, you’ll have to pay to get them replaced.
Inspect all parts for functionality.
Once you have removed the cover, it’s important to inspect the parts of the grease trap. You will systematically remove and clean each of these parts, so it’s important you know where they are located and how to put them back in the proper place. If you want to ensure everything goes back together properly, why not draw out a diagram to refer back to later?
Work out the amount of trapped debris.
Using a wooden dowel, you can find out how much debris is in your grease trap. Insert the wooden dowel into the grease trap and gently guide it to the bottom of the trap, swirling lightly so that the grease and oils mark the wood. Use a tape measure to determine how many inches of waste are present. This will provide you with an idea of how much debris is in the trap. You must then record the results in a FOG (fatty oils and grease) pump out the report. These reports are issued by the Environmental Protection Agency (EPA).
Remove any standing water.
Next, it’s time to remove any standing water from the tank of your grease trap. You can empty the standing water into a large bucket and pour it down the drain to dispose of it.
Remove the grease from the trap.
Using a scoop, remove the waste from your grease trap and put it into a small bucket. Next, scoop the bucket into the trap and bring out all the solidified waste so that you can throw it away. It would help if you also spent this time removing any large pieces of oil, fat, and grease that have attached themselves to the trap. To do this, it’s best to use a wet/dry vacuum. This will ensure you clear all fat and grease bits, large and small.
Clean all grease trap parts thoroughly.
Take your time cleaning the lids, trap sides, and individual parts with soap and temperature at room temperature. You can use a steel pot scrubber to remove any hard-stuck waste without damaging the trap. You should also rinse everything thoroughly afterwards to ensure all soap and debris is completely removed.
Reinstall all parts properly.
Lastly, reinstall each part by following the diagram you wrote earlier. Once all the parts have been reinstalled and are properly secure and working, replace the lid. And there you have it, a thoroughly clean grease trap!
Who should handle grease trap cleaning?
Only companies with a license to install and maintain grease traps can conduct grease trap cleaning and maintenance. If this is a service you require, we can send an engineer to inspect or install grease traps and offer on-hand advice on maintaining and ensuring your grease traps remain fully functional.
Once you’ve worked out how regularly your grease trap needs to be cleaned, you need to decide who will do the cleaning. While it is possible to take the DIY approach, it can be very unpleasant, as we’ve seen above. Not many people want to tackle huge amounts of brown, smelly grease. Furthermore, many establishments do not have the right equipment to deal with it safely. So, it’s best to call in our grease trap professionals to get the job done properly.
At ASL, we are experts in grease trap cleaning. You can find more about the services we provide on our grease traps page.
